
Smart How-to Solutions For Common Windows 11 Problems
In this guide, you'll discover effective solutions to the most common problems you may encounter with Windows 11 Pro. Whether you're struggling with system errors, software settings or looking for ways to optimize your system, these helpful tips will help you step by step. Leave your frustration behind and improve your experience with Windows 11 Pro by following the right steps. Let's get started and get your computer running like never before!
Key Takeaways:
- Troubleshooting: Understanding common problems in Windows 11 Pro can help you find solutions quickly.
- Updates and drivers: Regularly checking and updating your system and drivers prevents many technical problems.
- Backups: Be sure to make regular backups to prevent data loss in case of system failures.
Troubleshooting Windows 11 Pro
Identifying the Causes of Slow Performance
If you notice that your Windows 11 Pro system is running slowly, it is important to first identify the causes. Often, unnecessary background processes, too many open applications or even an outdated hardware component can contribute to slow performance. Take the time to check your Task Manager for processes that consume a lot of resources and close the applications you don't need.
In addition, viruses and malware can have a significant impact on the speed of your computer. Make sure you have a reliable antivirus software installed and run it regularly to remove any threats. Also, don't forget to clean up your hard drive and defragment your system periodically to optimize performance.
Resolve Common Error Messages
Error messages can be frustrating, especially if they appear unexpectedly while using Windows 11 Pro. It is crucial to understand what these error messages mean and how to fix them. In many cases, a simple restart of your computer can resolve minor problems. Also, try looking up the error message online; often others have had the same experience and an effective solution is available.
In addition, some error messages may be related to outdated drivers or software inconsistencies. Updating your drivers and system software regularly can help avoid these problems. So it is advisable to always keep your system up-to-date to minimize error messages.
If you encounter a specific error message, try the steps suggested on the Microsoft support pages. You will often find detailed instructions there that will help you further troubleshoot.
Troubleshooting Windows Update
Windows Update is crucial to maintaining the security and functionality of your system. If you experience problems with updates, such as stalled downloads or error codes, there are several steps you can follow. Make sure your Internet connection is stable and check that there is enough disk space available on your system for the updates. A lack of space can seriously disrupt the update processes.
Another effective way to solve problems with Windows Update is to use the Windows Update troubleshooter. This tool scans your system for possible problems and offers suggestions on how to fix them. In addition, manually resetting components involved in Windows Update can also provide a solution. However, this may be a step that requires some technical knowledge.
Remember that regularly checking and updating your system is essential. Ignoring updates can lead to security vulnerabilities and long-term performance problems. By following these tips, you can avoid most problems with Windows Update and keep your system performing optimally.
Smart Tips for Optimizing Windows 11 Pro
Windows 11 Pro, like any other operating system, can sometimes feel sluggish or not function properly. Fortunately, there are plenty of ways to optimize your system and improve performance. Below are some effective tips to improve your experience with Windows 11 Pro:
- Disable unnecessary startup programs
- Manage background apps for better performance
- Use Task Manager to check system load
Disable Unnecessary Startup Programs.
When you start your computer, several programs may load automatically. This can significantly slow down startup time and increase system load. To fix this, go to Task Manager by right-clicking on the taskbar and selecting "Task Manager. Under the 'Startup' tab, you will see a list of programs that start up when your PC boots up.
Select the programs you do not need at startup and click "Disable. This will reduce the time it takes to boot up your computer and also improve overall performance. By disabling unnecessary applications, you can make significant gains in your system's performance.
Manage Background Apps for Better Performance
Background apps are programs that run in the background even when you are not actively using them. These can use a lot of system resources, reducing the speed of your computer. You can manage these apps by going to "Settings" and selecting "Privacy & Security. Then click on 'Background apps' and choose which apps are allowed to run in the background.
By limiting background apps, you can free up resources for the tasks you do perform. This can improve the overall speed and efficiency of your system. Keep in mind that not all background apps are safe to close; some are required for essential functions.
It is important to know which background apps are affecting your performance. If you are not sure, it is better to research the specific apps before disabling them.
Use Task Manager to Check System Load
Task Manager is a powerful tool that helps you keep an eye on your system's performance. You can open it by pressing "Ctrl + Shift + Esc" or by right-clicking on the taskbar. In Task Manager, you can see which applications and processes are active, as well as CPU, memory and disk space usage.
By regularly checking Task Manager, you can quickly identify which applications are using a lot of resources and shut them down if necessary. This not only helps make your system faster, but also prevents your computer from crashing.
Task Manager also allows you to track details about your processes and their performance in real time. This information is crucial if you want to diagnose and fix problems with your system.
Knowing that you follow these simple steps, you can significantly improve the performance of your Windows 11 Pro and make your computer run faster and more efficiently.
Factors affecting the performance of Windows 11 Pro
When optimizing the performance of Windows 11 Pro it is important to understand the factors involved. The tuning of various system components can impact the speed and overall efficiency of your computer. Here are some key elements to consider:
- Outdated drivers
- RAM data management
- Disk space
The impact of outdated drivers on system speed
Outdated drivers can have a significant negative impact on the speed of your system. They can cause conflicts with new software and lead to compatibility problems. This can make your computer slow to respond or even crash. It is crucial to update your drivers regularly to take advantage of the latest enhancements and security updates.
Fortunately, there are several methods to check your drivers and keep them up-to-date. You can use the built-in Windows Update feature or manually check the hardware manufacturers' websites. These updates can not only improve speed, but also improve the stability of your system.
Understanding the role of RAM in Windows 11 Pro
RAM (Random Access Memory) plays a crucial role in the performance of your Windows 11 Pro-system. It acts as temporary storage for data your computer uses while it works. The more RAM you have, the more tasks your system can handle simultaneously without becoming slow. A lack of sufficient RAM can cause slowdowns and performance issues, especially if you open multiple applications at the same time.
It is important to keep an eye on your RAM usage, especially when you are running heavy applications or multitasking. You can do this through Task Manager, where you can see how much RAM is in use and how much is available. It is recommended that you expand your RAM if you find that your system is often running at full capacity.
How disk space affects overall performance
The available disk space on your Windows 11 Pro system can also directly affect performance. When your disk is nearly full, it can result in slower loading times and reduced system speed. Windows requires a certain amount of free space to function effectively. Therefore, it is essential to regularly delete unused files and applications.
Also, a full disk can cause your computer to have trouble running updates and processing temporary files. Maintaining enough free space on your hard drive can make a big difference in how smoothly your system runs. Consider using disk cleanup tools to manage your disk space efficiently.
Perceiving the impact of all these factors can help you improve and optimize your Windows 11 Pro experience.
Advanced Solution Techniques
When troubleshooting Windows 11 Pro, it is sometimes necessary to dig deeper. Here are some advanced techniques you can use to solve stubborn problems.
- Use the Event View to identify system problems.
- Perform a System File Check to repair damaged files.
- Perform a clean boot to isolate problems.
- Check drivers for updates and compatibility.
- Use the Command Prompt for advanced system commands.
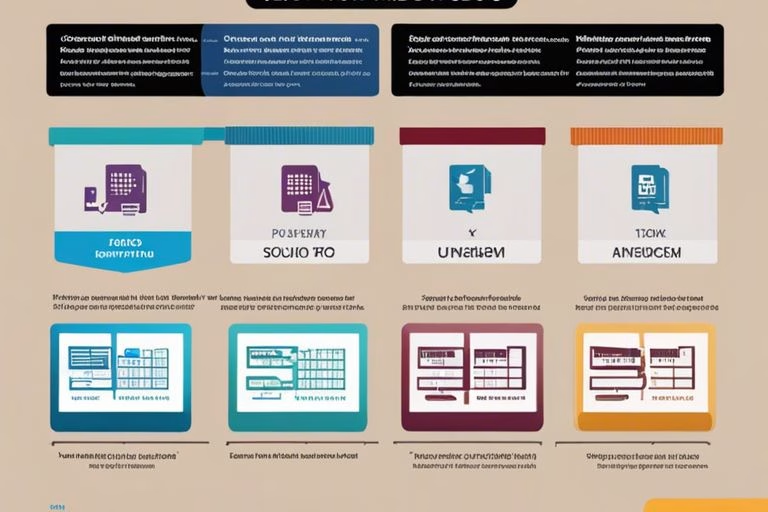
| Technology | Description |
|---|---|
| Event View | Review and interpret system logs to diagnose problems. |
| System File Check | Recover damaged or missing system files. |
| Clean startup | Determine the cause of software problems by temporarily деactivating startup programs. |
Use Event View to Identify System Problems
The Events Viewer is a powerful tool in Windows 11 Pro that lets you view logs of system events. You can use these logs to analyze error messages and warnings that affect your system performance. Open the Events View by right-clicking the Start button and selecting "Events View. Look especially for critical and error messages recorded shortly before your problems occurred.
By identifying problems using these logs, you ech get clear clues about which hardware or software may be responsible for the failures. Circulating error codes can also help you find solutions online or through technical support.
Perform a System File Check to Recover Corrupted Files
If your system is slow or unreliable, a damaged system file may be the culprit. Use the System File Check utility (SFC) to check for and repair damaged files. Open the Command Prompt as administrator and enter the command sfc /scannow. This process may take some time, depending on the speed of your computer.
When SFC is finished, it informs you of any repaired files. If the utility is unable to fix all the problems, consider running the Deployment Image Servicing and Management (DISM) tool for a more thorough check.
Perform a Clean Boot to Isolate Problems
A clean boot helps identify software conflicts that can cause problems in the operation of your system. You do this by preventing non-essential programs and services from loading at Windows startup. You can perform a clean boot by going to "Control Panel," "System Administration," and then "System Configuration. Then deactivate the startup program settings and restart your computer.
After performing a clean boot, observe your system to see if the problems persist. If your system works correctly after that, slowly reactivate programs and services to determine which is the culprit.
By applying these advanced techniques, you can address smaller problems step by step and potentially prevent larger failures that could affect your productivity.
Tips for Improving the Security of Windows 11 Pro
Securing your system is critical, especially in the increasingly dangerous digital world. Here are some helpful tips to improve Windows 11 Pro security:
- Always use the latest updates to Windows to plug security holes.
- Enable two-factor authentication for an additional layer of security.
- Configure Windows Defender for maximum protection.
- Make use of strong passwords and consider using password managers.
Assume that these tips can help you make your system more resilient against unwanted intruders.
Enabling Two-Factor Authentication for Strengthened Security
Two-factor authentication is an effective way to increase your security. By enabling this feature, you are not only prompted to enter your password, but you must also complete a second verification step, such as a code sent to your phone. This makes it much more difficult for hostile actors to gain access to your accounts.
Enabling this feature is easily done through your Microsoft account settings. This ensures that even if your password is compromised, your account is still protected by this extra layer of security.
Configuring Windows Defender for Maximum Protection
Windows Defender is Windows 11 Pro 's built-in security system, and it provides powerful protection against malware and other threats. By properly configuring your Windows Defender, you can ensure that your computer is well protected against attacks. You can customize specific settings to optimize protection, such as scheduling regular scans and enabling real-time protection.
You should also open the "Security Center" and go through the various sections such as "Virus and Threat Protection" and "App and Browser Management" to adjust the configuration. Make sure all options are enabled for maximum security. Regular updates to Windows Defender are essential to deal with new threats.
To take full advantage of Windows Defender, you should also make sure there are no conflicting antivirus programs running on your system. This can undermine Defender's effectiveness, and it can cause your computer to become vulnerable to threats.
Using Strong Passwords and Password Managers
One of the easiest ways to improve your security is to use strong and unique passwords for all your accounts. Avoid using obvious passwords, such as your name or date of birth. You might also consider using a password manager, which will help you generate and store complex passwords.
Password managers not only offer convenience, but they also allow you to create secure passwords that are difficult to crack. This allows you to focus more on other important aspects of your security strategies without the hassle of remembering different passwords.
Take the time to renew your passwords regularly and use features such as password auto-fill by your password manager. This not only helps you stay secure, but also saves time in daily online activities. Strong passwords are a fundamental part of securing your Windows 11 Pro.
Smart How-to Solutions For Common Windows 11 Problems
Personalizing the Start Menu and Taskbar
One of the first steps you can take to personalize your Windows 11 Pro experience is to customize the Start menu and taskbar. You can change the size of the icons and choose which apps to display there. This not only allows you to quickly access the programs you use most often, but it also makes the interface more uncluttered. To do this, right-click on the taskbar and go to "Taskbar Settings," where you can adjust various options.
Moreover, you can also disable or rearrange live tiles in the Start menu to make it even more user-friendly. Personalizing these elements ensures that you create a work environment that best suits your work style. Remember to check your settings regularly to stay up to date with the latest features Microsoft is adding.
Changing Default Settings for a Better User Experience
To improve your user experience in Windows 11 Pro, tweaking the default settings can make a big difference. This includes changing settings such as the default browser, e-mail client and even your desktop background. By adjusting the default settings to your preferences, you can work more efficiently and save time. Go to "Settings," and click on "Apps," where you can quickly access the settings you want to adjust.
In addition, you can also check privacy settings to make sure your data is secure and that you share only the information you want to share. This is crucial for a secure and personalized experience with Windows 11. Invest time in exploring these options, as proper configuration can lead to a smoother workflow.
By adjusting the settings to your liking, you create an ergonomic digital environment that not only suits your preferences, but can also increase your productivity. After each adjustment, remember to check that everything works correctly to ensure a seamless experience while working with your device.
Creating a Customized Desktop Environment
Your desktop is the foundation of your digital interaction, and it is important to make it a customized environment that reflects your style and needs. This can include adding shortcuts for frequently used programs, organizing folders and files into a logical structure and choosing a background image that offers inspiration and motivation. By arranging your desktop according to your preferences, you make it easier to access everything you need on a daily basis.
In addition to the features above, you can further personalize your desktop by adding **widgets** that give you the information you want to see, such as the weather, news or your calendar. Remember that a clean and organized desktop not only promotes productivity, but also creates a positive work atmosphere. Take advantage of the various tools available in Windows 11 Pro to create your ideal work environment.
A personal desktop environment also means regularly updating your background and icons to maintain a refreshed look. This can help boost your creativity and always keep you motivated as you work on your tasks. Experiment with different themes and layouts until you find the optimal configuration that helps you best.
Smart How-to Solutions For Common Windows 11 Problems
Troubleshooting Windows 11 Pro can sometimes feel overwhelming, but with the right smart solutions, you can address common issues quickly. Whether you're experiencing problems with updates, software compatibility or network connectivity, there are always practical steps you can follow. Start by checking the settings and support options within Windows itself, as often these already offer immediate and simple solutions. Also, don't forget the system recovery options and the built-in troubleshooter that can help you get back up and running faster.
In addition, it is helpful to search online for specific solutions to your problem, as the Windows community is vast and often shares valuable tips and tricks. By combining this knowledge with your own troubleshooting skills, you will not only fix your current problems, but also be better prepared for future challenges. Take the time to learn about Windows 11 Pro's features so you can be proactive when you encounter another problem. With this approach, you will increase your confidence in using the operating system and make working with technology a smoother experience.
FAQ
Q: What should I do if my Windows 11 Pro crashes during startup?
A: If your Windows 11 Pro crashes during boot, try the following steps: Restart your computer and press the F8 key (or Shift + F8) repeatedly to get to the boot menu. Choose "Safe Mode. If you can boot into safe mode, there may be software problems. Perform a system restore to a previous restore point that worked. If you can't boot into safe mode, try using a bootable USB stick with Windows 11 to get recovery options.
Q: How can I troubleshoot drivers in Windows 11 Pro?
A: Problems with drivers can often be solved by going to 'Device Manager'. Right-click on the Start button and select "Device Manager. Look for devices with a yellow exclamation mark, indicating driver problems. Right-click on the problem device and select 'Update driver'. You can also try the 'Automatic search for updated drivers' option. If that doesn't work, you can manually download the drivers from the manufacturer's Web site.
Q: My Windows 11 Pro network connection keeps dropping out. What can I do?
A: If your network connection keeps dropping out, there are several steps you can take. Start by checking your modem and router; restart them. Next, check that your PC's network adapter is functioning properly via 'Settings' > 'Network and Internet' > 'Status'. Click on 'Fix network problems' to have any problems detected automatically. In addition, you can try resetting your network settings by going to 'Settings' > 'Network and Internet' > 'Statistics' and then choosing 'Network Reset'. Don't forget to restart your router after this reset.