
Installation Guide for Microsoft Windows 11 Professional
Contents of this manual
- Download
- System requirements
- License and Activation
- Upgrade from Windows 11 Home to Windows 11 Pro
- Upgrade from Windows 10 Pro to Windows 11 Pro
- Clean installation
- Note
Download
Microsoft Windows 11 Pro
Download the version you want using the download link below:
Download link: https://www.microsoft.com/nl-nl/software-download/windows11
(Make sure your device has more than 4 GB of RAM and that you are using the 64-bit version.)
Do you need the installation file in a different language or version? Please refer to the “Downloads in other languages” section later in this document.
System requirements
Please read this carefully
These are the minimum system requirements for installing Microsoft Windows 11 on a PC. If your device does not meet these requirements, you may not be able to install Microsoft Windows 11.
You can download the PC Health Check app. This app will tell you whether your device is compatible with Microsoft Windows 11.
| Part | Requirement |
| Processor | 1 gigahertz (GHz) or faster, with 2 or more cores on a compatible 64-bit processor or System on a Chip (SoC). |
| RAM | 4 gigabytes (GB). |
| Storage | A storage device with 64 GB or more. Note: See the section later in this document regarding the storage space required to keep Microsoft Windows 11 up to date. |
| System firmware | UEFI, compatible with Secure Boot. |
| TPM | Trusted Platform Module (TPM) version 2.0. Please refer to the Microsoft instructions to verify that your PC meets this requirement. |
| Graphics card | Compatible with DirectX 12 or later, with a WDDM 2.0 driver. |
| Monitor | High-definition (720p) display, with a diagonal measurement greater than 9 inches, featuring 8 bits per color channel. |
| Internet connection and Microsoft account | Microsoft Windows 11 Professional requires an internet connection and a Microsoft account. All editions of Windows 11 require internet access to install updates and to download and use certain features. Some features require a Microsoft account. |
License and Activation
Once you have the license, follow the steps below to activate your Windows operating system.
Activation using the product code:
Go to Settings → System → Activation → Change Product Code.
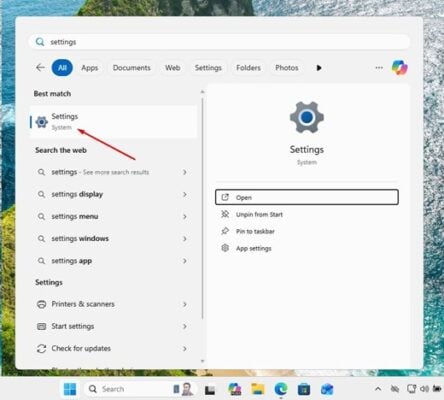
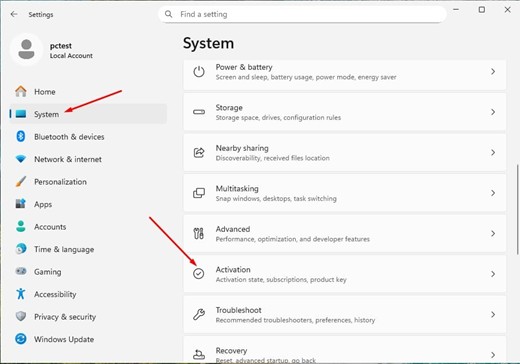
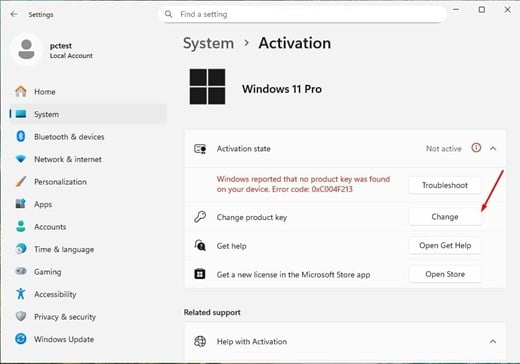
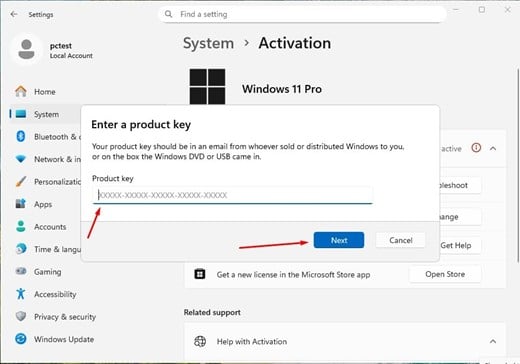
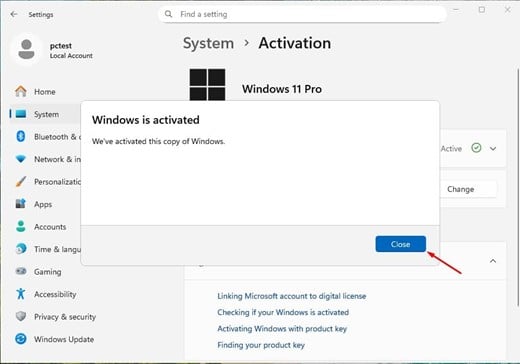
This will ensure that your operating system is activated correctly.
Upgrade from Windows 11 Home to Windows 11 Professional
To upgrade from Windows 11 Home to Windows 11 Professional, you can use a generic product key for the initial upgrade. This key does not permanently activate Windows; it simply allows you to switch to the Pro edition. You can then enter the license key you purchased to fully activate Windows.
The procedure is as follows:
1. Go to Settings
- Open Settings > System > Activation.
2. Change the product code
- Select “Change Product Key” and enter the generic key for Windows 11 Professional: VK7JG-NPHTM-C97JM-9MPGT-3V66T.
- Click “Next” and follow the instructions. The upgrade to the Pro edition will now begin.
- If you see one of the following error messages on the screen, temporarily disable your internet connection and repeat this step. Your PC will restart automatically. After it restarts, you can re-enable your internet connection and continue with the next steps.
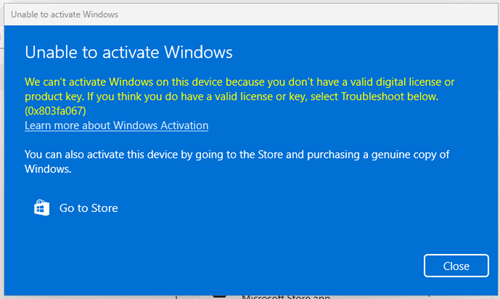
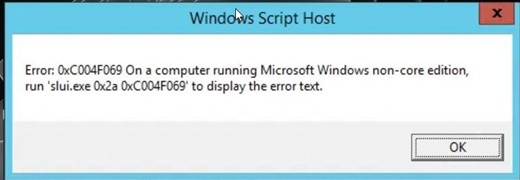
3. Enter the activation key you purchased
- Once the system has been updated to Windows 11 Pro, go back to Settings > System > Activation.
- Select “Change Product Key” again and enter the Windows 11 Pro license key you purchased.
- Follow the instructions to activate the license.
4. Restart the device if necessary
- After activation, the system may ask you to restart so that all changes take effect.
- Once you follow these steps, you will have an activated copy of Windows 11 Pro on your device.
Upgrade from Windows 10 Pro to Windows 11 Pro
Check the requirements:
Download from Microsoft: https://aka.ms/GetPCHealthCheckApp
- Install the application and launch it.
- The application will indicate whether your computer meets the requirements (TPM 2.0, Secure Boot, compatible CPU, etc.).
- If everything is in order, proceed to the next step.
Once you have checked these steps and confirmed that everything is in order, we can proceed with updating your operating system.
Use the Windows 11 Installation Assistant
- Download at: https://www.microsoft.com/software-download/windows11
- Click “Download now” under “Windows 11 Installation Assistant”.
- Run the installation file (Windows11InstallationAssistant.exe).
- Accept the terms and conditions → the assistant will download and perform the upgrade from Windows 10 Pro to Windows 11 Pro, while preserving your programs and files.
Clean installation
IMPORTANT NOTE:
This installation guide is intended for users who wish to perform a clean installation of Windows 11 on a new or existing hard drive. This requires intermediate to advanced technical knowledge. If you have no prior experience with clean installations of operating systems, we recommend having an expert perform the procedure to avoid errors or data loss.
If you already have Windows 11 Home installed and simply want to upgrade to Windows 11 Professional, follow the procedure described in the section “Upgrading from Windows 11 Home to Windows 11 Professional”.
Terms and Conditions
- An empty USB flash drive with a storage capacity of at least 8 GB.
- A computer running Windows 10 or Windows 11 (to create the installation media).
- Back up all your files before you begin, as this procedure will format the drive and delete all existing data.
- Back up your important files. A clean install will format the hard drive and erase all previously stored data.
- Make sure you have access to your passwords, files, and licenses before proceeding.
Step 1: Download the Media Creation Tool
Download the official Microsoft tool that lets you create a bootable USB drive.
- Download the Microsoft Windows 11 installation file by clicking the “Download” button at the top of this guide.
- Run the downloaded file.
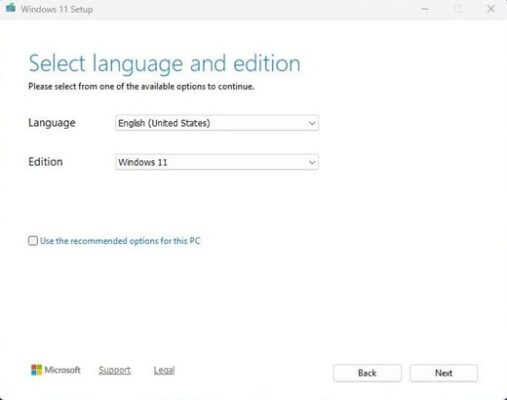
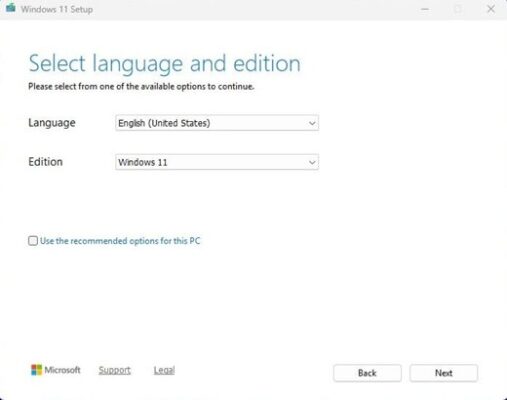
Note: When you launch the tool, three initial setup windows will appear (accepting changes, accepting terms and conditions, selecting language and Windows version). Follow the on-screen instructions.
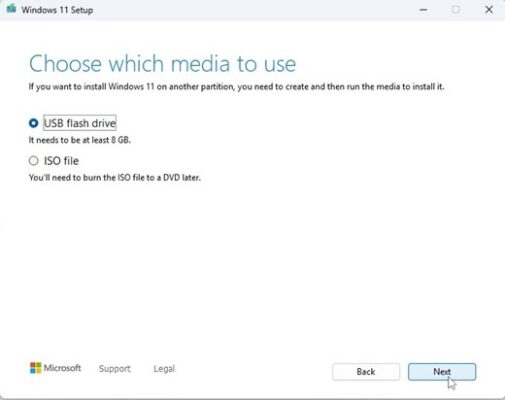
Step 2: Create the ISO file or install directly to a USB drive
Under “Select the medium you want to use,” you’ll see two options:
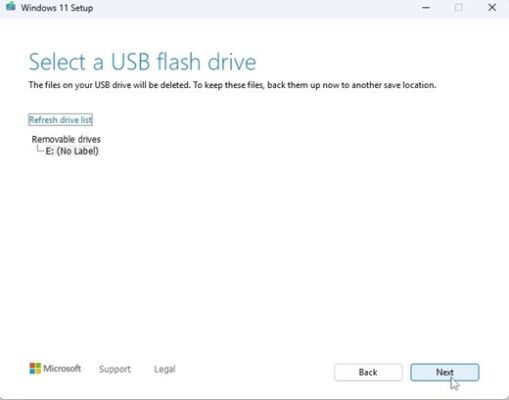
USB flash drive:
Plug the USB drive into your PC, and Windows 11 will automatically download to the drive
Step 3: Start the Windows 11 installation
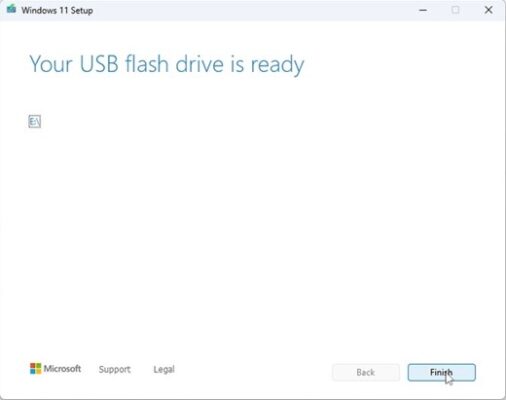
- Once the installation USB is ready, connect the USB drive to the computer.
- Turn on the computer and open the BIOS or the boot menu.
- Set the boot order so that the USB flash drive is the first boot option.
- Save the changes and restart the computer.
Note: Refer to your device’s manual for instructions on how to access the boot menu. This varies by manufacturer (F2, F12, ESC, DEL, etc.).
“Select language and edition”
Select the operating system language and the 64-bit architecture.
Note
Microsoft has gradually phased out support for a number of older products. As a result, phone activations are no longer available. If you encounter any problems or have any questions during installation, please contact our customer service team, which is available 24/7.
For faster assistance, you can also contact us directly via our live chat, which is available 24/7 on our website.
Can't find a solution?
To activate the program on multiple devices, follow these instructions on each device where you want to activate the program.
We hope you have a successful installation. If you continue to experience problems or have questions about the installation, please don’t hesitate to contact our customer service at any time. We’ll assist you as soon as possible.